|
Perfecting Right Angles With A JigThis is jig started with a forum thread from Chris Dowie in Canada. He is a frequent poster on the Railroad Line Forums. Depending of the stock you have available to make this clamp, you can work with sizes up to four or six inches in width.
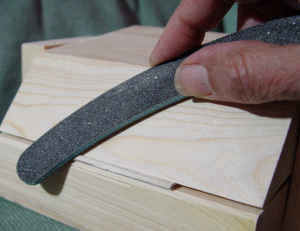
The inside jaw of the clamp has a flat part that mates with the other halve that is about 1" wide. From that flat there is a 45 degree angle drawn on the wood and cut, so then the working surface of the clamp is a 45 degree angle from the flat clamping surface. Clamp a bit of card in there and sand it to a perfect 45 degree angle. Chris cautioned, “You would need a scrap the same thickness as the stock you want to miter clamped in the jaws and then scribe the 45 degree angle on the clamp and cut it out and sand it smooth with the scrap stock clamped in place.” Mine came out quite a bit different but serves the same purpose working with Balsa or similar 1/16th to ¼ inch materials.
Two bolts in the base board and a single bolt in the 45-degree clamp allow the clamp to swivel to accept a sheet of wall material. I miter them after I have mounted the printed material to the Balsa. Once in place, I center the wall on the base protruding slightly over the edge of the base. To clamp it in place, I insert the wedge in the back and press it home with my palm.
With the manicuring stick level with the 45-degree slope, slide it back and forth a dozen times and the job is done. Once you try this little gem you will wonder how you ever got along without it.
|
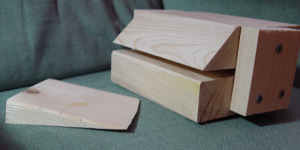
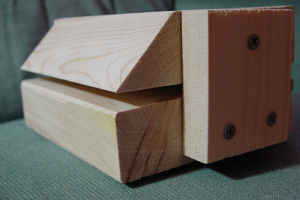
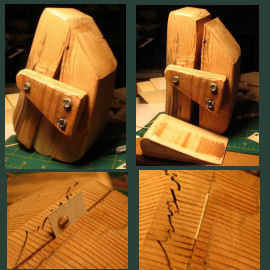 This clamp pivots where you see the one screw. It is made from a scrap piece of 4" x 4" cedar post and a couple of bits of 3/4" plywood. there is a wedge that goes in the back to hold the clamp tight.