
July 15, 2008
Many Changes Coming To Your LHS
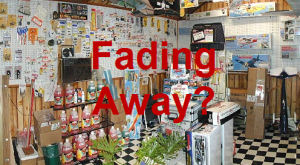
Stopped by my Local Hobby Shop last week and at mid-afternoon one shop attendant and myself were the only ones basking in the air conditioning on a sweltering day."It's getting bad, I'm not sure we'll be open in another couple of months," he offered
Oil prices are not only affecting us at the gasoline pump. Many hobbiests are seeing it dramatically eating away their favorite pastime.
If you aren't feeling the pinch now, you will be...All in the name of energy dependence.
We took an in depth look over the past few days in a series beginning with
Killer Prices Coming To A Hobby Shop Near You
With the ever increasing costs to modeling, looking for economic alternatives to continuing the hobby, is a popular endeavor of many involved in scale modeling.
Click-Kits are just such an alternative. The variety and economics of card stock modeling have never been more appealing to me as I start populating a new model railroad layout with structures.
They go together easy, are easy to footprint design, modify and kitbash to produce a structure that fits both its location and my imagination.
I borrowed an idea from the plastic kit industry and started development of the first modular paper wall sections.
Modular construction of model buildings like their prototypical
residential counterparts, modular homes offer:
| o | Unlimited printing (duplication) of purchased wall element |
| o | Minimal tools requirement |
| o | Versatility of design |
| o | Choice of scratchbuilding or purchasing detail items |
What's Your View From The Roof Down Model structures get a lot of detailing, weathering and attention during kit marketing, purchasing and construction but seldom does the roof rate more than a passing thought yet it is the first thing your visitor sees.
Many materials have been used for roofing over the years. Through the early parts of the 20th century, tar paper and other rolled roofing materials were common. Cedar shakes were often found on depots, sheds, houses and other sloped-roof buildings. Slate shingles (often in a diamond pattern) were common for larger. fancier structures. Metal roofs of various types, including copper and galvanized steel were also used.
Flat roofs were often tarred and many had crushed rock over the roof itself. Many modern roofs are simply smooth concrete or composite material, sloped slightly for drainage.
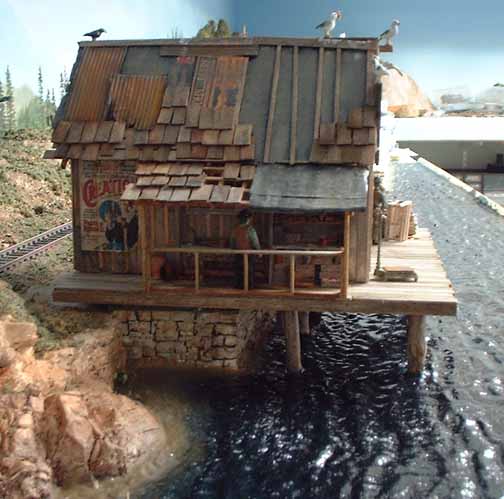 |
| Imagine Darryl Huffman's Alaska Packers with a plain black roof |
The first thing they see is the roofs, the roof structures and the roof “furniture” that set the tone of the visit.
This is where scratch builders don’t spend a lot of time, they spend it on the front or back where they know they will be aiming the camera.
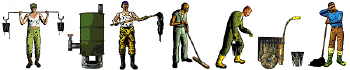
This is "a little off the wall" but you can create an awfully authentic looking mini-scene with workers spreading tar on a freshly tarred roof.
Start by doing a portion of the roof using grimy black acrylic paint topped with a light dusting of gray chalk. Now for the fresh look. Use a thick coat of black liquid electrical tape in overlapping coats. Let it dry for about 20 minutes.
What really makes the scene is a set of "Woodland Scenics Roofing Figures". They come with a tar pot and some guys spreading tar with rakes. The guy leaning on the mop will draw the most attention.
Making Plastic Look Like Wood Whether you are working with individual plastic planks or sheets of clapboarding, you can improve their appearance by making them look more like wood.
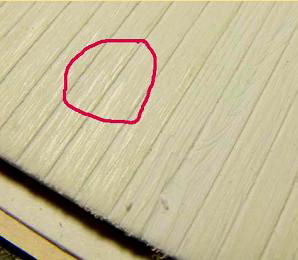
Provide an initial roughness by rubbing the boards with the edge of a manicure stick or a strip of wood covered with sandpaper. Do this in the direction of the grain.
Next, with a pointed utility knife scribe "wood grain" into the plastic in varying lengths. If you get it too deep and the edges raise up, use a razor blade to remove the excess.
 |
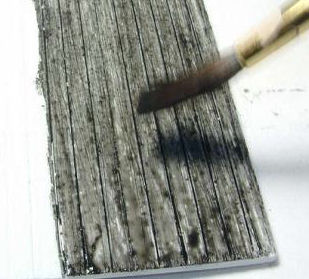 |
| Texture the plastic with an initial sanding using a manicure stick or 220 sandpaper. Really beat it up by following with 50-grit sandpaper and roughen it further with a utility knife with a sharp point. | Use black Dye-na-flow fabric paint it is available online. Apply it direct from the bottle. If it is too dark add a little water to the paint on the plastic. Allow the paint to mottle and puddle. |
Not really a difficult process but a little time is involved. You can make as much or as little rough a wood grain as you want from very slight to really rotten. The reason for using styrene for most construction like this is because it is usually stronger than real wood.
Styrene Painting Tip From RC Racers When you are painting Styrene or Lexan models where straight lines are a necessity, overspray can ruin the job.
Here’s a tip from the RC guys:
When the paint seeps under paint masks or masking tape put a little WD-40 on a rag and wipe the overspray you don’t want. WD-40 gets under paint, dirt, grime and grease to clean. It also dissolves adhesives, allowing easy removal of labels, tape and excess bonding material.
After removing the paint, re-clean the area with some Windex and the surface is ready for more detail work.
Stumping Your Layout or Diorama
You can cover a lot of ground and make an area of your layout look heavily wooded by putting in 10-20 stumps as opposed to making a number of trees in varying heights.Face it, it takes decades to grow a prototypical tree and just minutes to make it a stump. The same ratio carries over to your scale railroad layout, military diorama or wargaming battlefield.
So, no matter which you are involved in—stump it.
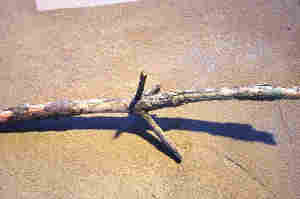
Start by taking a walk in a wooded area on a gathering expedition.
You are looking for Spruce trees where you can reach into the interior to pluck some dead twigs.
Here’s an ideal example:
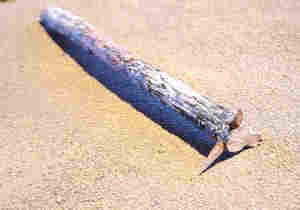
The next cut makes it a stump. Lop off the bulk of the stem so what you have left is about two to three scale feet above ground.
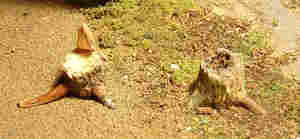
Use enough of these and you’ll created a “logged over” forested area with a couple background trees and a convincing backdrop painting.