|
Covered Bridge Buildtorial
|
Funny how after half a century it now becomes the focus of a scratch built N-Scale structure of a central section of the St. Johnsbury and Lamoille County Railroad (St.J. & L.C. for short).
Having grown up in St. J. er, St. Johnsbury, VT I can remember the bustle of railroads, but never gave them much thought. I don’t even remember riding the St. J and L.C as a kid.
But I digress (happens a lot after you turn 70 and have an excuse), I really want this to be a tutorial on building a model railroad covered bridge.
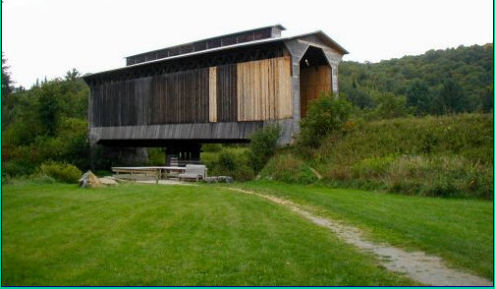
The n-scale layout itself is a re-make of the Carolina Central which features a river I have affectionately dubbed the Lamoille River, an excuse to build my version of the Fisher Covered Bridge which still exists just outside Wolcott, VT.
Historical documents are not too thorough in providing dimensions beyond length, width and height, but that is enough to get started.
You need to also determine the requirements of you bridge site, you may already have a river gorge requiring a span longer by 10-20 feet. It’s your railroad, you make the decisions.
Remember, your length is going to be abutment to abutment, the width outside wall to outside wall is 15 feet for a covered bridge. The bridge I am working on has a set of inside guard rails.
You need to provide at least 20 feet (often 22 feet) for overhead clearance (deck to headboard).
Prior to 1820 bridge engineers worked primarily with king post designs, arched truss construction or a combination often utilizing heavy timbers.
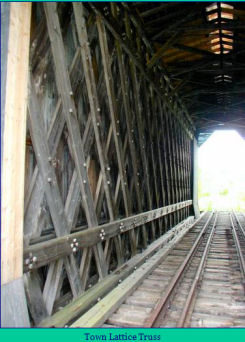
Ithiel Town patented the Town Lattice Truss system in 1820 which utilized a lattice of sawn planks pegged at each intersection with treenails (pronounced trunnels).
This lattice design spread the load over a wider network and it could be built over a longer framework, spanning a longer distance between supporting piers.
The Fisher Bridge (built in 1908) is a continuous span with one center support.
It has stood in place for 101 years.
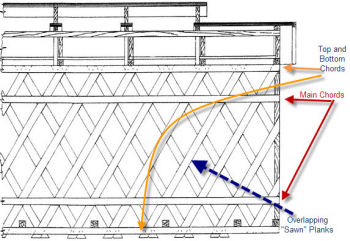
I start with full length chords (upper and lower longitudinal members). In N-Scale these are .048” X.048” stripwood (8” X 8”). I found the best way to keep them parallel is to set chords along two adjacent lines on my cutting mat and then taping them into position with masking tape.
The tricky part is keeping the sawn planks (in N-Scale I used .40” X .040” stripwood) parallel and evenly spaced, you’ll be putting down as may as 50 planks depending on bridge length. I used two things to maintain positioning. (A) a 45-degree angle layout tool, mine was the angle creator from “The Chopper” . (I used the Chopper to create 60 equal length sawn planks/), and (B) a handy length of one quarter by one eighth-inch wood.
 The first full-length plank goes between the chords in about an inch from the end of the chords. Mark the spot and use your 45-degree angle creator to place a dot on the second chord closer to the end. I use Elmer’s Glue-All, but any PVA adhesive will do. I place two drops on a piece of plastic about the same distance apart as the two dots.
Dip both ends and place to straddle the two dots overlapping both chords by an eighth of an inch.. This first plank should be clamped into position until the glue sets. I use a couple clothespins. Lay your eighth-inch spacer alongside and place your next plank with glue on each end. I press into place with the angle creator. Follow this process with another 30-50 planks depending on bridge length until you reach the other end of the chords.
Now start the second layer after removing the clothespins
Use the same routine with the exception of reversing the angle to create diamonds when you look through the planks.. Once both courses of planks are glued down, fill out the ends by cutting planks to fit between the open point and the adjacent chord. Trim three or four more to fill out to the end. Follow the same procedure for the other end.
Now that you have the routine down, start the second wall of the bridge using the same procedure.
I need to confess to mistake which needs to make a change back at the beginning of this construction project.
After I finished my two walls, I decided I wanted to stain the chords and planks to a light brown, almost orange. I had read somewhere that cold coffee would do this. I had a little left from breakfast and poured it into a gallon plastic zip bag and dunked the two finished walls. They needed to soak for 15 minutes.
When I went to pull them out, they collapsed in my fingers into planks and chords, all lightly browned. I put the pieces onto a sheet of aluminum foil and baked them in the oven at 350 to dry them out so I could start over.
My advice, if you want to stain the interior chords and planks, do it while they are not glued together.

SBI!
Quick-Finder