|
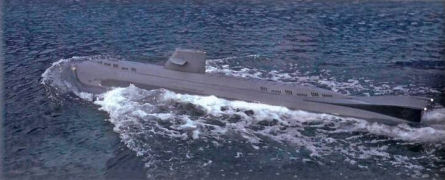
Ocean Diorama Sets Ship Model
|
 |
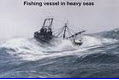
This fishing boat is bashing its way through “head seas”, with waves running directly against the boat’s course. This results in violent ship motions. |
 |
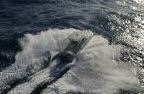
The opposite is true of a ship in a following sea which can become dangerous as overtaking waves will lift the stern and drive the bow into the water. |
Remember when planning your diorama that actual wave swells can be as much as 300-400 feet apart. You can shorten that distance with modelers license, but keep in mind the fact that few ships have the length to include more than two swells in their length.
The ocean’s surface is a series of parallel ridges (wave tops) crisscrossed by smaller ripples. You will seldom find a level area. The height of these seas can be anywhere from one foot to as high as 60 feet.
Keep in mind, seas travel in one direction which is the same as the prevalent wind so any flags on your vessel should be flying the same direction as the seas.

Start by completing the model which will be the centerpiece, once it is in place, work on it will be limited. If you are planning any ship lighting relying on outside power sources, these need to be in place with wires ready for final attachment.
Next, lay your model on the board in its proper location (diagonals add interest). If you later want your model to be removable, you will need to cover the bottom with Saran Wrap.You will need to make provisions for a single screw from the bottom of your model, into the base with say, a removable deck, a screw through a smoke stack of a submarine’s sail to hold the model in place while you build up the surrounding “ocean”.
I prefer using Polymer clay as it has a longer curing time. You can also use plaster of paris with nearly the same results.
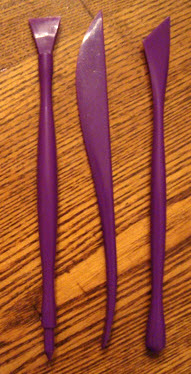
Next trowel on your ocean to the depth of the quarter-round and smooth it up to the waterline of your model. As it dries, use molding tools.
Now trowel on an appropriately thick sheet of your molding material. Smooth it up to the model waterline. As it dries, when it is firm but not set, sculpt in the larger waves with a smooth edged sculpting tool.
If your model will be shown in motion, sculpt in a wake as well as a bow wave and trough (but be subtle here, they will be defined with color more than shape).
You can add texture and smaller waves by molding them with a damp sponge as the material dries. You’re on your own here in terms of the pressure you apply and the orientation your choose. Do the same for the wake and waves trying to emulate colored photos of the scene you are modeling.
Next you will paint the sea, I prefer water soluble acrylics. This is where your originality comes in. There are so many shades and tones you can use depending on whether you are setting your scene in deep sea, a coastal area or harbor, the era, and even the weather have a bearing on the sea’s color. Start by laying on a base coat and adding a darker wash in hollows. Then add a lighter wash for upper portions of the waves. Add lighter highlights for wave tops and wake curls. It is your model and you will make these decisions. When you have it the way you want, let it dry completely.
Next, add a glossy sheen to your water. Future Floor Wax works great for this. Pour it into a paint cup and use an old brush to carefully brush it on your model. Slow and easy avoids air bubbles. For best result, use two coat with a few hours drying time between them.

SBI!
Quick-Finder